Spark Cluster Installation
Prerequisites
- Create static ip addresses for each node in the cluster
- Create meaningful hostnames for each node in the cluster
- Standard update on each node
sudo apt update
Install Java
Install Java On Each Node
sudo apt-get install openjdk-8-jdk
Set JAVA_HOME Environment Variable. First, find the current location.
update-alternatives --config java
Open and edit the bashrc file. Export the JAVA_HOME variable.
sudo nano ~/.bashrc
export JAVA_HOME=/usr/lib/jvm/java-8-openjdk-amd64/jre/bin
Save and Exit
<ctrl+x>y<enter>
Apply those changes
source ~/.bashrc
Show the location of JAVA_HOME
echo $JAVA_HOME
Check the version of java
java -version
Install Apache Spark
Download Spark on each node
wget https://dlcdn.apache.org/spark/spark-3.5.1/spark-3.5.1-bin-hadoop3.tgz
Extract Spark
tar xvf spark-3.5.1-bin-hadoop3.tgz
Move the extracted spark contents to a new spark folder
sudo mv spark-3.5.1-bin-hadoop3 /opt/spark
Edit the bashrc file to add SPARK_HOME to the path
sudo nano ~/.bashrc
Add SPARK_HOME to the path
export SPARK_HOME=/opt/spark export PATH=$PATH:$SPARK_HOME/bin:$SPARK_HOME/sbin
Save and Exit
<ctrl+x>y<enter>
Apply those changes
source ~/.bashrc
Networking
Edit the hosts file:
sudo nano /etc/hosts
- Make sure there is a line for each ip address in your cluster along with each hostname
- I’ve also added the hostname of my hadoop master node
- I’ll be creating my jupyter notebooks from my laptop. This means my laptop is my driver. I’ve added a line to represent my laptop. You might want to create another node specifically as your driver, or do something similar to what you see below.
192.168.1.100 ubuntu100 192.168.1.101 ubuntu101 192.168.1.102 ubuntu102 192.168.1.103 ubuntu103
192.168.1.136 lenovo.localdomain
Passwordless Authentication
We’ve already gone through how to do this in a hadoop cluster. We’ll do the same thing here, only we’ll start with the master spark node and copy our keys into each spark worker node.
For example, from the master node, run the following. Note: 100 is my master, 101 and 102 are my workers. I did not have to create a special hadoop user in this case.
ssh-keygen -t rsa -b 4096
ssh-copy-id andrew@ubuntu100
ssh-copy-id andrew@ubuntu101
ssh-copy-id andrew@ubuntu102
Spark worker file
On the master node, we should have a simple workers file. You can either copy the template or create one from scratch. WE do not need a worker file on the worker nodes.
sudo nano /opt/spark/conf/workers
Edit the file. Comment out the localhost or your master node will be treated as a worker. Add the hostname of each worker node. In my case, I might just start with adding
ubuntu101
spark-env.sh
On the master node, edit the spark-env.sh file.
sudo nano /opt/spark/conf/spark-env.sh
We can update several things here, but make sure to at least update these three items:
SPARK_LOCAL_IP="192.168.1.100"
SPARK_MASTER_HOST="192.168.1.100"
SPARK_MASTER_PORT="7077"
Similarly, update the spark-env.sh file on each worker node. It will still point to the same master node and master port, but the local ip should point to the local ip of each worker node.
SPARK_LOCAL_IP="192.168.1.101"
SPARK_MASTER_HOST="192.168.1.100"
SPARK_MASTER_PORT="7077"
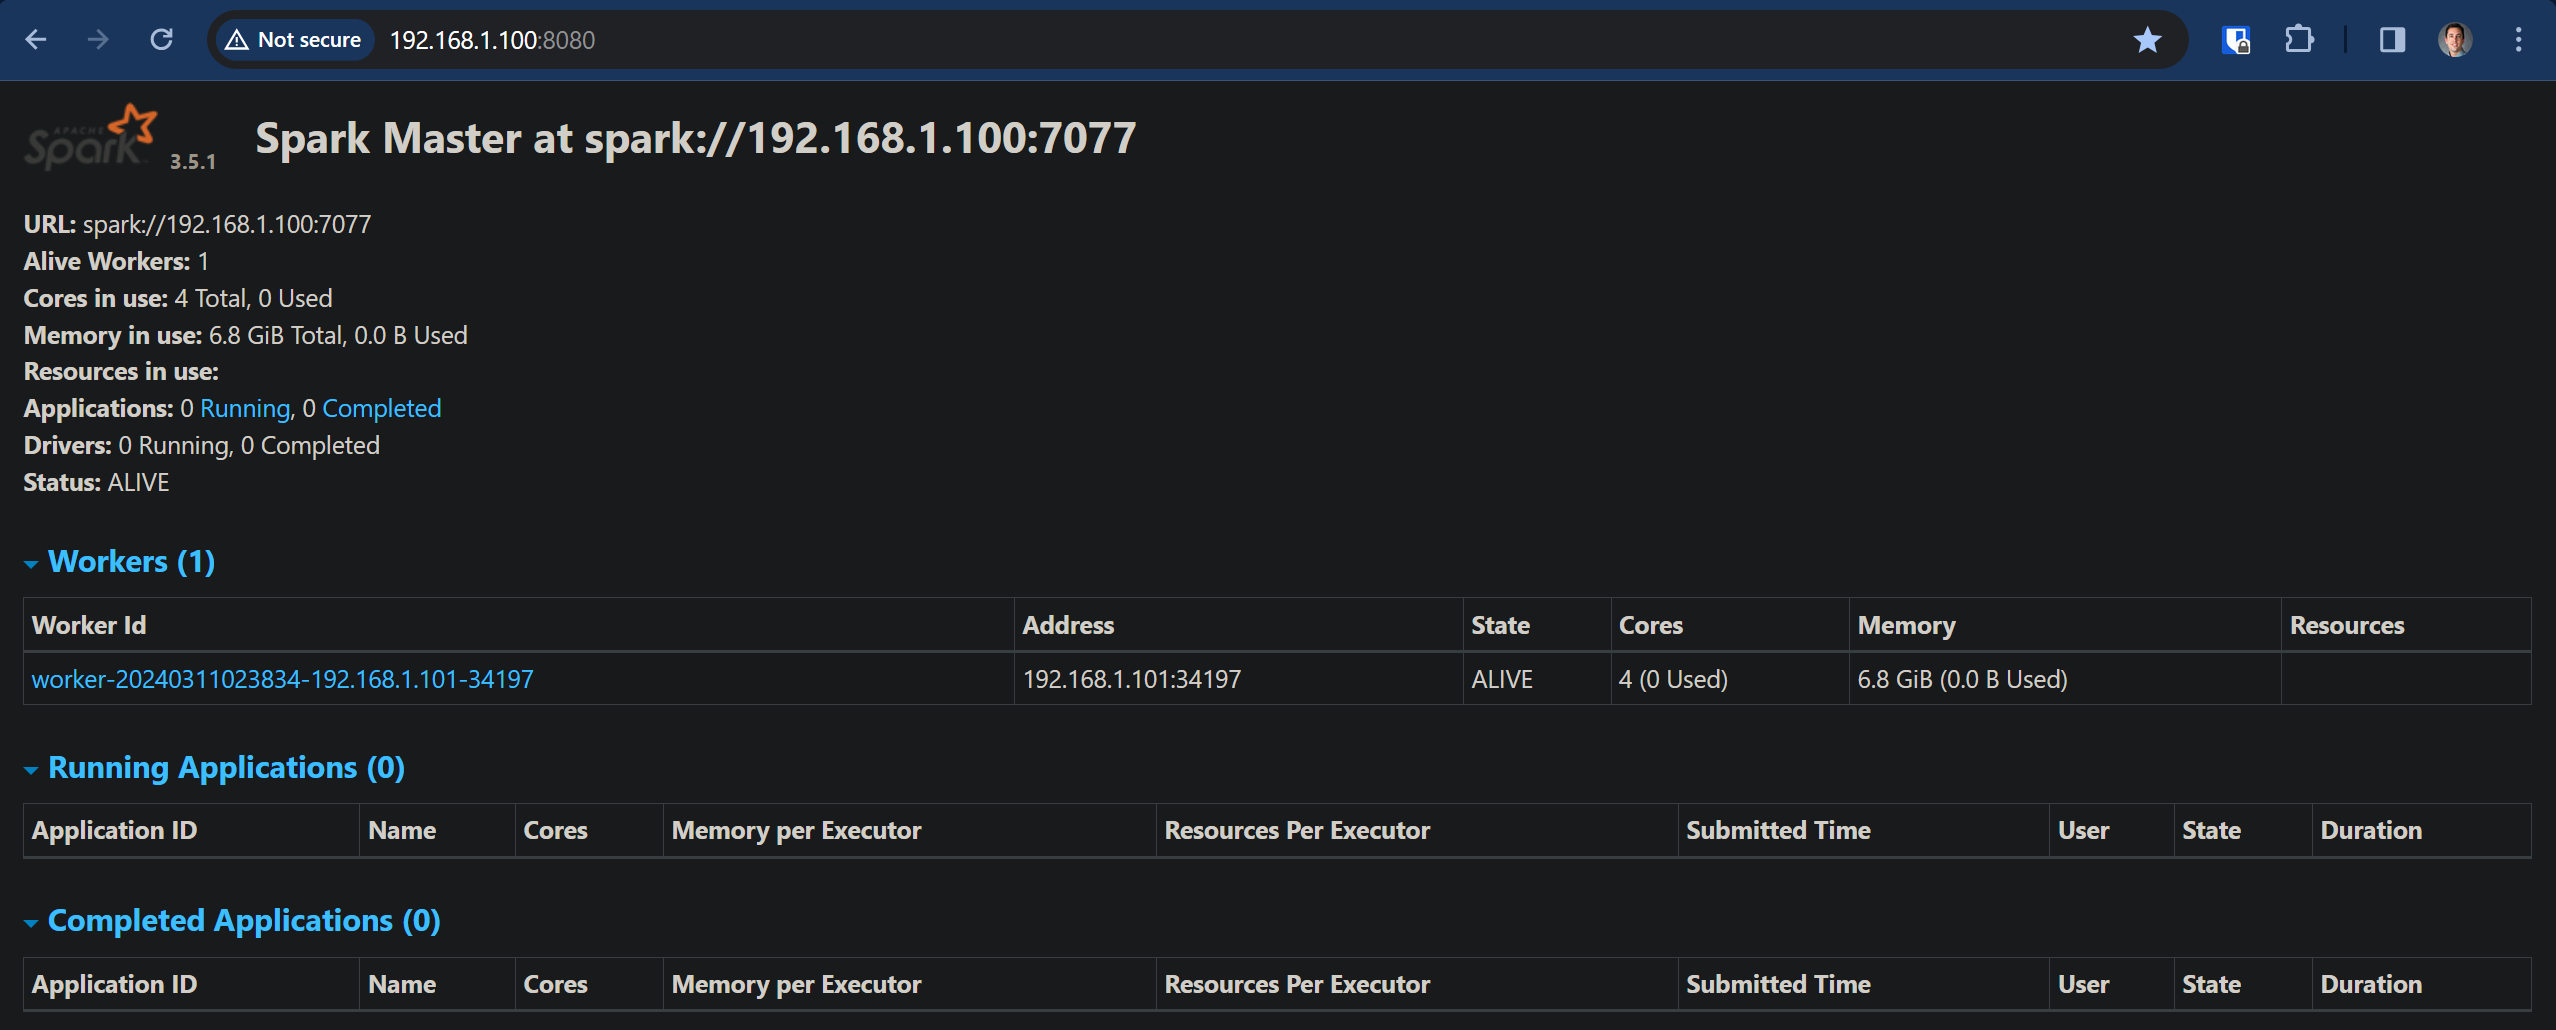
Managing Spark
jps
The jps command can be run on each node to show whether we have any Master or Worker java processes running.
start-all.sh
Running the start-all.sh command from the master node will start the cluster and all worker nodes.
stop-all.sh
Running the stop-all.sh command from the master node will stop the cluster and all worker nodes.
Navigate
Spark Master: http://192.168.1.100:7077